
How To Create A Paint Brush Application Using OpenCV

1. Import everything we need
2. Functions - All We Need
3. Trackbar, Mouse Event Call and Main Loop
4. Here is the Demo
5. What Next?
In this article, we are going to make a paint application that features the brush functionality with customizations like:
2. Functions - All We Need
3. Trackbar, Mouse Event Call and Main Loop
4. Here is the Demo
5. What Next?
- Changing brush size using a trackbar.
- Changing paint color using a trackbar.
- Viewing the selected color on the window.
Issue with macOS trackbar values
Somehow the in-built create trackbar method of OpenCV does not show selected trackbar values on macOS, hence we will display the values on the image window itself.
If you do not have OpenCV installed, I suggest you visit here and check the Prerequisites steps on the process of installation.
Without any further ado, let’s start making our first paintbrush application.
Somehow the in-built create trackbar method of OpenCV does not show selected trackbar values on macOS, hence we will display the values on the image window itself.
Import everything we need
Create a python file, name it whatever you like. Add below code in it (make sure you have OpenCV installed):
import cv2
import numpy as np

draw = False
window_name = "Paint Brush Application"
bgr_track = {'B': 0, 'G': 0, 'R': 0}

img = np.zeros((512,512,3), np.uint8)
cv2.namedWindow(window_name)

# Initial color window, showing black color, same as paint area
cv2.rectangle(img, color_win_position[0], color_win_position[1], (0,0,0), -1)
-
First 2 lines import necessary libraries. Here, we are going to import
cv2andnumpywith an aliasnp. -
Next 3 lines define some constants that we are going to use later.
drawsays if the mouse is drawing on image window,window_namedescribes the name of the application window that isPaint Brush Applicationandbgr_trackis a dictionary that we will use to keep track of previousBGRvalues (you will know later why we are doing this). -
Next 2 lines create an area for our paint application and set a name to the window.
imgcontains a numpy array of 3 dimensions where each value is zero, meaning it will be a black colored area.cv2.namedWindowattaches a name to the image we just created, we can later use this window name to place all other things like trackbar. - The last line of this code snippet creates a rectangle window which we will be using for viewing our color that we are choosing from the trackbar.
font = cv2.FONT_HERSHEY_SIMPLEX
img = cv2.putText(img, "R: ", (10, 30), font, 0.5, (255,255,255), 1)
img = cv2.putText(img, "G: ", (90, 30), font, 0.5, (255,255,255), 1)
img = cv2.putText(img, "B: ", (170, 30), font, 0.5, (255,255,255), 1)

img = cv2.putText(img, "0", (30, 30), font, 0.5, (255,255,255), 1)
img = cv2.putText(img, "0", (110, 30), font, 0.5, (255,255,255), 1)
img = cv2.putText(img, "0", (190, 30), font, 0.5, (255,255,255), 1)
- Now, we put text on the image window that will work as the counter for values of the BGR trackbar. Since on macOS, the track bar is not showing selected values, so we need this functionality. Also, take it as a side activity that we can do.
-
We put text using the
cv2.putTextmethod of OpenCV and set a font as well. We can set any font we want, here we are using Hershey simplex font. -
We are placing text like
R:and0separately because we need to change only number values and not constants likeR:. - We can select any random position for these counters on the image and check which best suits our needs.
Functions - All We Need
Add below python code snippet to the same file where we left above:
def nothing(x):
    pass

def update_R_value(x):
    global font, img, bgr_track
    img = cv2.putText(img, f"{bgr_track['R']}", (30, 30), font, 0.5, (0,0,0), 1)
    img = cv2.putText(img, f"{x}", (30, 30), font, 0.5, (255,255,255), 1)
    bgr_track['R'] = x

def update_G_value(x):
    global font, img, bgr_track
    img = cv2.putText(img, f"{bgr_track['G']}", (110, 30), font, 0.5, (0,0,0), 1)
    img = cv2.putText(img, f"{x}", (110, 30), font, 0.5, (255,255,255), 1)
    bgr_track['G'] = x

def update_B_value(x):
    global font, img, bgr_track
    img = cv2.putText(img, f"{bgr_track['B']}", (190, 30), font, 0.5, (0,0,0), 1)
    img = cv2.putText(img, f"{x}", (190, 30), font, 0.5, (255,255,255), 1)
    bgr_track['B'] = x
-
We create a function like
nothingthat does nothing just do a simple pass. We can use it to fulfill our need to pass it as a parameter where it is required but we want it to not do anything. -
Next 3 functions are the same with just a difference of
B,GandR. Let’s exploreupdate_R_value. -
Here we are trying to update the counter value of
R: 0on the image window. -
First, we get all global variables and try to replace the already present value of
0againstR:.
cv2.putText keep track of previous text on the same position so it could just replace it. Here we need to first put the same text as the previous value, like 0 in this case, and change color similar to the background of the paint area (here it is black) so that it is like that it vanished from the paint area.
Now we just put a new trackbar value, which is passed to the function as x with the color white in the same place. Lastly, we update the bgr_track dictionary that keeps the track history of the last value and the same process repeats.
The same kind of thing is going on with the other 2 functions, just for different color trackbar values.
In simple terms, take the below scenario:
-
Let’s say we have a list -
l = [0, 0, 0]. Here all the values were-1initially representing the start stage of the list. It is a special kind of list where we can only change its values only if they are-1first and nothing else. -
What we are going to do now is that, replace the first index (
Rcolor value let’s say) with a new value. -
So we try to replace
0knowing its position with-1because if we replace it directly it overlaps and doesn’t work. So what we do instead isl[0] = -1and then after setting it to-1, it is back to its original state from where we can do anything to its value. Now we do the actual replacel[0] = x.
def draw_circle(event, x, y, flags, param):
    global draw, img

    if event == cv2.EVENT_LBUTTONDOWN:
        draw = True

    elif event == cv2.EVENT_MOUSEMOVE:
        if draw:
            cv2.circle(img, (x,y), cv2.getTrackbarPos("Brush Size", window_name),
                       (cv2.getTrackbarPos("B", window_name),
                        cv2.getTrackbarPos("G", window_name),
                        cv2.getTrackbarPos("R", window_name)),
                       -1)

    elif event==cv2.EVENT_LBUTTONUP:
        draw = False
        cv2.circle(img, (x,y), cv2.getTrackbarPos("Brush Size", window_name),
                       (cv2.getTrackbarPos("B", window_name),
                        cv2.getTrackbarPos("G", window_name),
                        cv2.getTrackbarPos("R", window_name)),
                       -1)
-
This method
draw_circlewill be passed to the mouse event callback method of OpenCV. It takes 5 parameters -eventthat gives what is the event type,xandythe position of mouse,flagsthat can give us any flags that mouse events raise and some otherparamrelated to mouse callbacks. We can ignoreflagsandparamsfor this case. -
We have 3 conditions here.
if event == cv2.EVENT_LBUTTONDOWNchecks for if the left mouse button down event occurred or not, if it happens then we will setdrawtoTrue. -
elif event == cv2.EVENT_MOUSEMOVEthis condition checks if the mouse is moving, we simply don’t want a moving mouse to draw on the paint area but we want a left button down moving the mouse to draw on the paint area, that’s where thedrawvariable comes in, which will be checked to see if a left mouse button is actually down or not. Then it creates a circle of defined radius that it gets from theBrush Sizetrackbar, the color of the circle from theBGRtrackbar and color fill is done via the last-1parameter value. This creates a circle while moving a mouse and this happens so smoothly that it shows an effect of a paintbrush. -
elif event==cv2.EVENT_LBUTTONUPis for when the mouse button is not clicked and we don’t want to draw on the paint area. Here, we setdrawtoFalseand draw the last circle on positions given.
Trackbar, Mouse Event Call and Main Loop
Add the following code to the same file:
cv2.createTrackbar("R", window_name, 0 ,255, update_R_value)
cv2.createTrackbar("G", window_name, 0, 255, update_G_value)
cv2.createTrackbar("B", window_name, 0, 255, update_B_value)
cv2.createTrackbar("Brush Size", window_name, 1, 8, nothing)
cv2.setMouseCallback(window_name, draw_circle)
-
Here, we create a track bar for
R,G,Bcolor values and forBrush Sizeadjustment.cv2.createTrackbarmethod takes the following arguments, trackbar nameR, window name where the trackbar needs to be put (herewindow_name), start value0, end value255of trackbar and last is a callback function which callsupdate_R_valuewhenever trackbar value gets changed. All 4 trackbars are similar to this structure and are self-explanatory now. -
cv2.setMouseCallbacktakes 2 parameters to set a mouse callback event, first one is the image windowwindow_nameon which this callback event should be tracked and the second is the callback function to call when a mouse event occurs.
Single callback for up and down keys
Notice here, that we don't have separate callback methods for MOUSE_UP or MOUSE_DOWN, but only a single one that captures all events with a passed parameter to callback function event and later we can use conditions to filter them out.
Now, add the following code to the same file for our main loop:
Notice here, that we don't have separate callback methods for MOUSE_UP or MOUSE_DOWN, but only a single one that captures all events with a passed parameter to callback function event and later we can use conditions to filter them out.
while(1):
    cv2.imshow(window_name, img)
    key = cv2.waitKey(1) & 0xff
    if key==ord('q'):
        break

    b = cv2.getTrackbarPos("B", window_name)
    g = cv2.getTrackbarPos("G", window_name)
    r = cv2.getTrackbarPos("R", window_name)
    cv2.rectangle(img, color_win_position[0], color_win_position[1], (b,g,r), -1)

cv2.destroyAllWindows()
-
Here, we want the loop to continue until it encounters a keyboard keypress event. We are going to quit the application whenever the
Qkey is clicked. -
Inside the loop, we are checking for keyboard quit condition and also getting
BGRvalues and displaying them in a rectangle atcolor_win_position. -
Finally, if the program exits the loop, then we simple destroy the unwanted image window using the
cv2.destroyAllWindowsmethod of OpenCV.
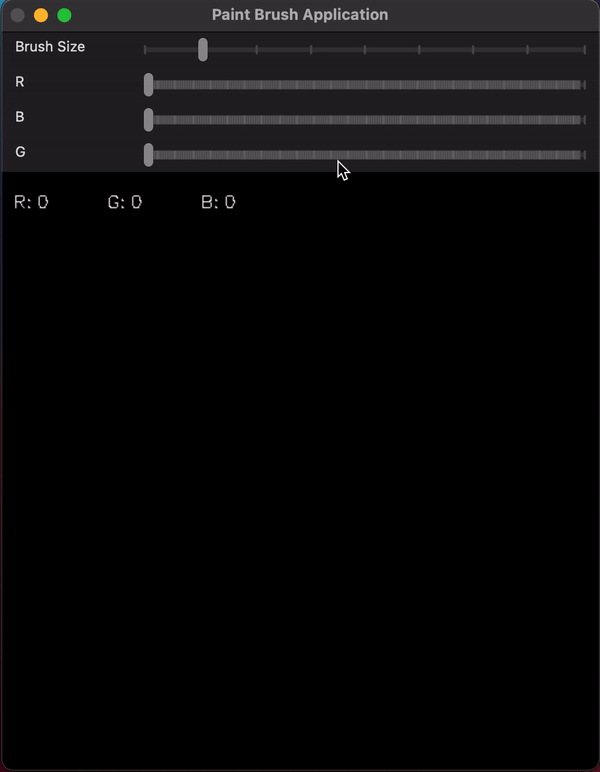
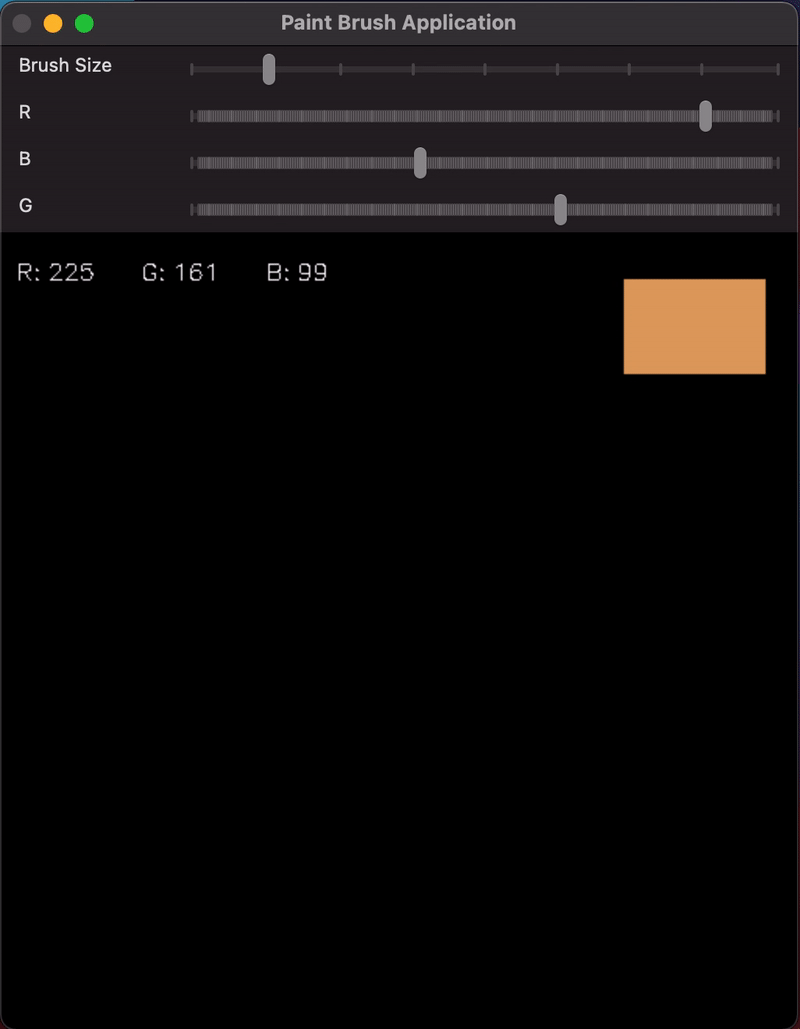
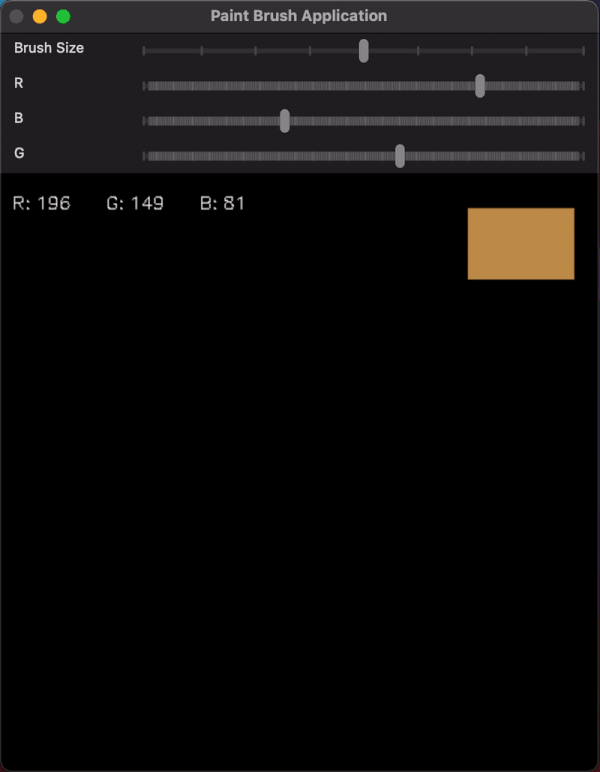
Here is the Demo
Displaying colour trackbar values.
Displaying colour trackbar colours.
Changing brush size.
Hello World, CodeKaro!
 I know, my paint skills are very poor!😰
What Next?
Well, that’s it from me. If you want to explore further, the following activities can be done to add more feature to the paint application:- Add utility to select brush type. Add rectangle, diamond, hexagon, etc shaped brushes.
- Try to include no-fill brush utility.
- Try to add a function that creates a circle or rectangle with a given size with a double click of the mouse on the paint area.
- Add a utility to clear the area and restart the work, by not having to close and restart the program.
- Just starting your Open Source Journey? Don’t forget to check Hello Open Source
- Need inspiration or a different perspective on the Python projects or just out there to explore? Check Awesome Python Repos
- Want to make a simple and awesome game from scratch? Check out PongPong
-
Want to
++your GitHub Profile README? Check out Quote - README
About Author
Siddharth Chandra
Namaste 🙏🏽 I am an Engineer and a Full Stack Developer hooked on Python & Scala. Besides Programming, I enjoy exploring OSFY, Mythology, Personal Finance and Manga 🧙♂️
Please share your Feedback:
Did you enjoy reading or think it can be improved? Don’t forget to leave your thoughts in the comments section below! If you liked this article, please share it with your friends, and read a few more!
